
Set your availability
For hosts who want bookers to see only the hours they actually work. Schedules, date overrides and the calendars that count as busy, all on the Availability tab.
How availability works
A schedule is a set of weekly hours in a timezone. Every event type picks a schedule, your default one unless you choose another. Bookers are offered times inside those hours, minus anything that is already busy, shaped by the event type's buffers, notice and limits.
Busy time comes from your bookings on every event type, your blocked time, events on your BlueHill calendar and, when connected, your Google Calendar.
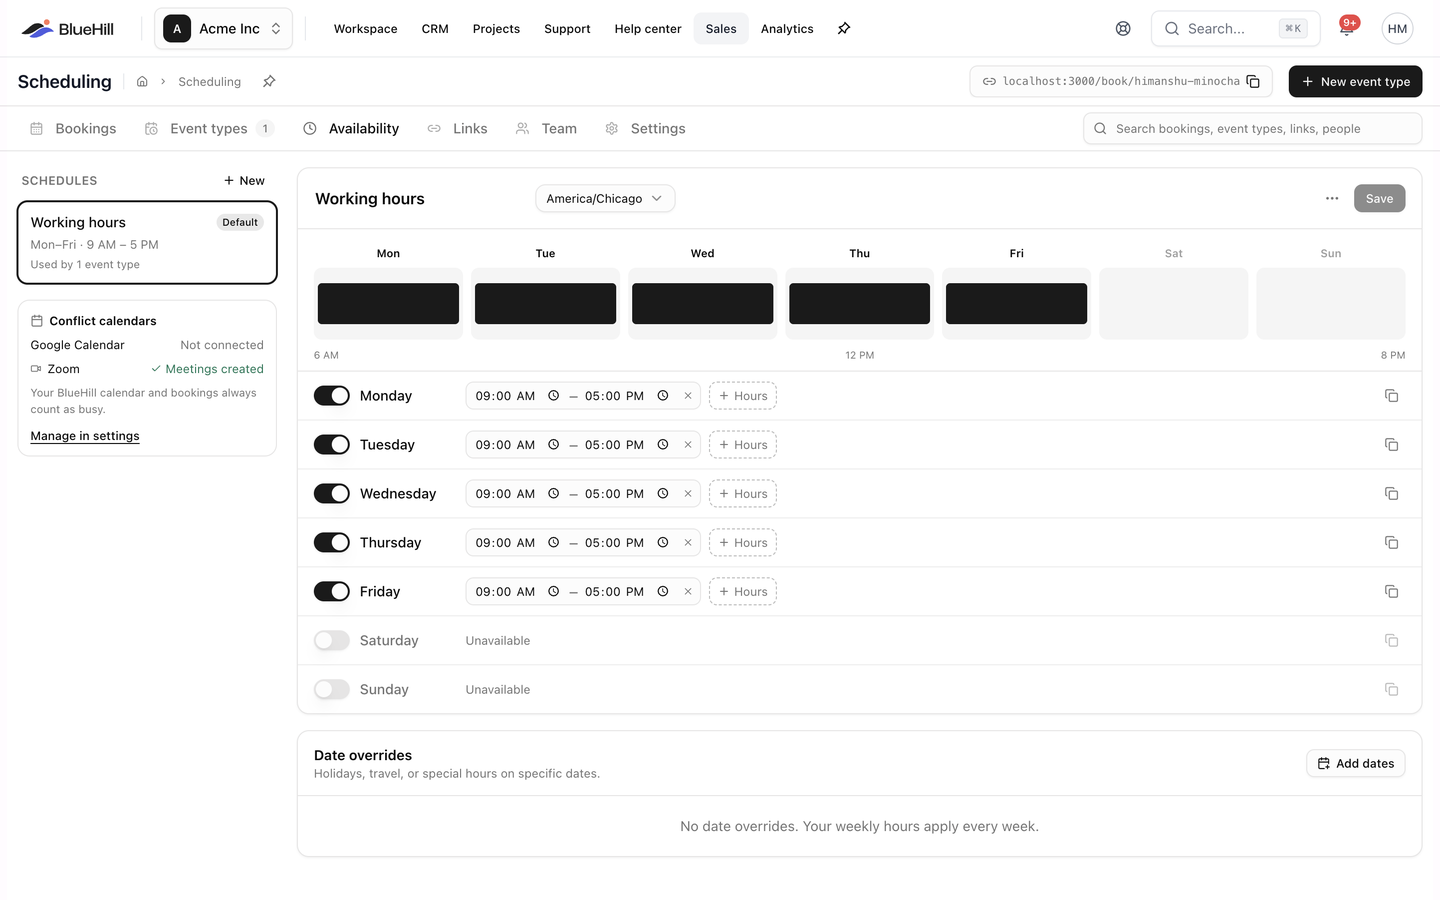
Schedules
The Schedules column on the left lists your schedules. Each card shows the schedule name, a Default pill on the default schedule, a summary such as Mon–Fri · 9 AM – 5 PM, varies by day or No hours set, and how many event types use it (Used by 2 event types or Not used yet).
- Click New to add a schedule. It is created as New schedule and a Schedule created message confirms it.
- Click a card to edit it. If you have unsaved edits, BlueHill asks Discard unsaved changes to this schedule? first.
Most hosts need one schedule. Add more when different meetings follow different hours, for example customer calls in the afternoon and internal reviews in the morning.
Edit weekly hours
- Pick a schedule. Rename it in the name field at the top of the editor (its placeholder reads Working hours).
- Choose the timezone. The picker has a Search timezones… box. Hours are interpreted in this timezone, and bookers see times converted to theirs.
- Switch each day on or off. Turning a day on adds 9:00 – 17:00; a day that is off reads Unavailable.
- Adjust the start and end of each range. + Hours adds a second range to the same day, for example to leave lunch free, and × removes one. A range whose end is before its start is outlined in red until you fix it.
- Use the Copy to weekdays icon on a day to copy its hours to Monday through Friday. A Hours copied to Mon–Fri message confirms it.
- Click Save. An Availability saved message confirms it.
The week strip above the day rows draws each day from 6 AM to 8 PM so you can check the shape of the week at a glance.
Date overrides
Date overrides change your hours on specific dates, for holidays, travel or special hours, without touching the weekly pattern.
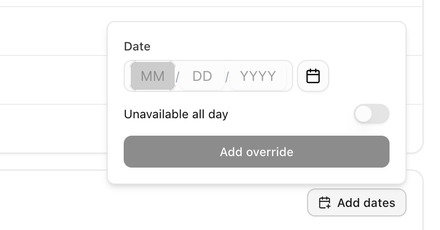
- Under Date overrides, click Add dates.
- Pick the Date.
- Leave Unavailable all day on to take the day off, or switch to Special hours and set a time range.
- Click Add override, then Save the schedule.
Each override shows its date, a badge reading Unavailable or Special hours with the times, and a trash icon to remove it. When there are none, the section reads No date overrides. Your weekly hours apply every week.
Default schedule and deleting a schedule
Open the ⋮ menu in the editor header:
- Set as default makes this schedule the one new event types use and the one Your default schedule points to. A message confirms "Name" is now your default.
- Delete schedule removes it. The dialog Delete "Name"? explains that Event types using it fall back to your default schedule. Choose Keep it or Delete. The item is unavailable while this is your only schedule.
Conflict calendars
The Conflict calendars panel shows what else counts as busy:
- A Google row with the connected account and Busy time checked, or Google Calendar with Not connected.
- A Zoom row with Meetings created or Not connected.
- The note Your BlueHill calendar and bookings always count as busy.
Manage in settings takes you to the Settings tab to connect or disconnect. See Connect Google Calendar and Zoom.
Tip: To keep one afternoon free without editing your hours, use Block time on the Bookings tab instead. See Block time.
Next: Create an event type.